Today we are announcing to launch of Selenium training series. In this series we’ll covering all Selenium topics in details & learn Selenium from basic to advanced. After requesting many readers for Selenium topics, we are creating Selenium Training videos with practical examples which is easy to understand and learn selenium quickly. As Selenium is open source, we recommend that practice at home on Selenium Training Series which will help to get learn easily. If you have any questions then please feel free to ask questions in the comments section below. We will make sure all relevant questions get answered. Keep eye on all Selenium series of training articles, so that you won’t miss any topic. Selenium Training Series Tutorials
- Tutorial 1 – Getting Started with Selenium IDE
- Tutorial 2 – Difference between selenium IDE, RC & WebDriver
- Tutorial 3 – What is Selenium Webdriver? – Selenium Training Series
- Tutorial 4 – How to run your first Selenium WebDriver script
- Tutorial 5 – Why Selenium Server not required by Selenium WebDriver?
- Tutorial 6 – How to Create Project in Eclipse IDE?
- Tutorial 7 – How to create Selenium WebDriver Test using Selenium IDE?
- Tutorial 8 – Start Selenium WebDriver Test Script on your own
- Tutorial 9 – Introduction to JUnit Annotations
- Tutorial 10 – How to use JUnit Annotations in Selenium WebDriver Automation Script?
- Tutorial 11 – Introduction of TestNG framework
- Tutorial 12 – How To Access Links & Tables Using Selenium Webdriver?
What is Selenium IDE?
Selenium IDE is simple, easy to learn & portable record and play tool for web applications. Learning curve for Selenium IDE is less & no need to learn test scripting language. It is open-source tool & available for download for free. Selenium IDE means Integrated Development Environment (IDE) used for selenium tests. It is come in terms of Firefox extension & used for recording, editing & playback scripts.
Features of Selenium IDE:
- Simple & easy record and playback
- Supports intellectual field selection options like ID’s, XPath, and Names.
- Support for Selenium user-extensions.js file
- Clever option for adding different assert options in scripts
- Save test scripts in several formats like Selenese, Ruby and many more formats.
- Supports Walkthrough tests
- Allow to customization through plug-ins easily
- Allow to set breakpoints & debug the scripts.
- Supports Auto-complete commands
Installation of Selenium IDE:
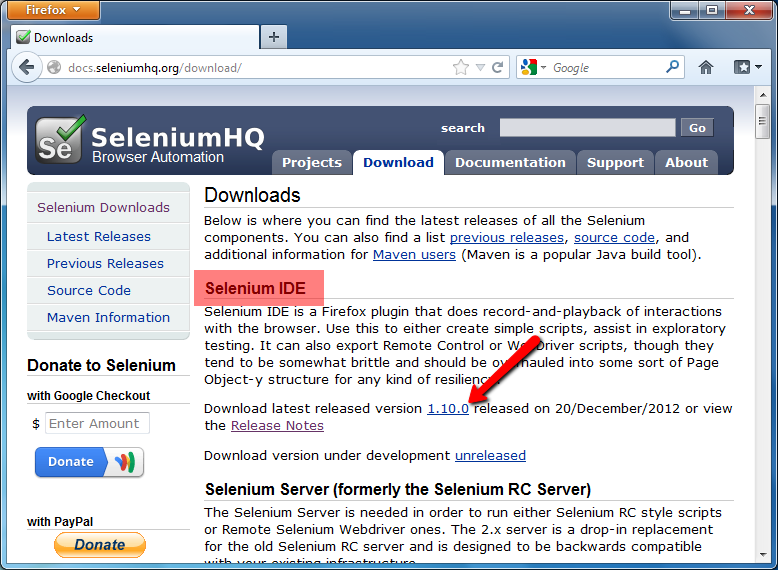
To learn Selenium-IDE, first you have to download Firefox & Selenium IDE extension on Firefox. Here are the simple steps to be followed to install Selenium IDE: 1) Download Firefox browser (if required) 2) Get Selenium IDE here.
3) Install Selenium IDE plugin on Firefox browser 4) Restart Firefox. 5) Navigate to Tools menus & click on newly added Selenium IDE (Ctrl + Alt + S) option.
Now you are ready to learn Selenium IDE!! Base URL: The Base URL field at the top of the Selenium-IDE window is very useful for allowing test cases to be run across different domains. Tool Bar: It supports different options like: Speed Control, Run All, Run, Pause/Resume, Step, TestRunner Mode, Apply Rollup Rules Test Case Listing Pane: Selenium IDE is open in new window. In the left side of the window shows the test case pan & all test cases will be listed in the section (default entry United). Multiple test cases can be added in this section & upon executing test cases all test cases are executed sequentially. Record Button: On the right side of the window you will see Record ON/OFF button, using this you can record start and stop the script recording. Test Case Pane: It’s test script editing window where your script is displayed in this section. It has two tabs, one for displaying the command and their parameters in a readable “table” format. The “Command” column displays the commands that takes the the action & values in this columns are very straight-forward like: open, click, select etc. The “Target” column displays the what you are trying to interaction with command. It can be represented a variety of ways:
- URLs – “/dashboard.action” – represents a url. The first part of the URL is the Base URL up at the top, and this URL is relative to that.
- Text – “link=Recording a Test” – the text of the link
- XPath – “//input[@value=’Search’]” – XPath is an XML-like language that can be used to specify the location of an element in a document
- Label – “label-Selenium IDE” – selects the item with the visible label of Selenium IDE.
- HTML id – “spacelink-SIDE” – this is the HTML id of the link
- HTML name = “searchQuery.queryString”
The “Value” column used to pass if any data pass to command. If you explore more on above three options then The best way to understand these values is to click on the command you are trying to use, and look at the bottom, on the Reference tab. It will give you information on how the command works, and what all the arguments are. Log Pane: At the bottom of the window you will see the Log panel where you can get the log generated once the test case is executed. It allows you to resize the all pans. Selenium IDE window is look like as:
Recording the first test case using Selenium IDE:
In the section we are seeing how to record the test case & re-run the test cases:
- Launch Firefox browser
- Enter URL https://www.google.com
- Navigate to Firefox menu Tools > select Selenium IDE option
- Confirm the Record button present in the right side of the toolbar is switched ON.
- In Google website enter search for “Software Testing Class”
- Click on Record button again to stop recording.
- Click on Run button to playback recorded test.
- The result will display something like this:
Please join this FREE Selenium training series to get expertise in Automation using Selenium. Also don’t miss to share this post with your friends. Ask your questions in the comments below. Stay tuned to get comprehensive list articles in Selenium training series.
Happy Testing…
⇓ Subscribe Us ⇓
If you are not regular reader of this website then highly recommends you to Sign up for our free email newsletter!! Sign up just providing your email address below:
Happy Testing!!!


