In the last tutorial we learnt about “Installation and Configuration of Soap UI – Complete Guide”, now let’s use this tool to build our first Soap UI Project. We are going to learn the following in this tutorial.
- Creating our first SoapUI Project.
- Adding a WSDL file for SOAP Web Service.
- SoapUI’s interface acquaintance.
- Assertions.
But first run the project given in the last tutorial to generate the WSDL file at below link
http://localhost:8074/web?wsdl
Steps to Create a New SOAP Project:
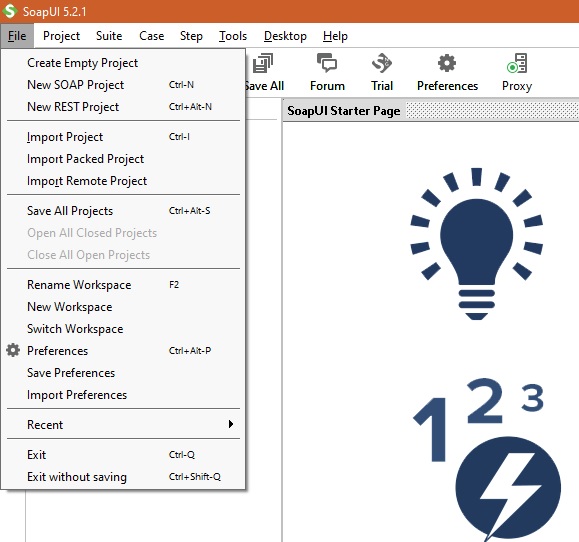
Step 1: Click on the File link and from the drop down menu click on New SOAP Project. There is shortcut link to open a new project window using (Ctrl+N). Image below demonstrate about to open a new project using SoapUI tool.
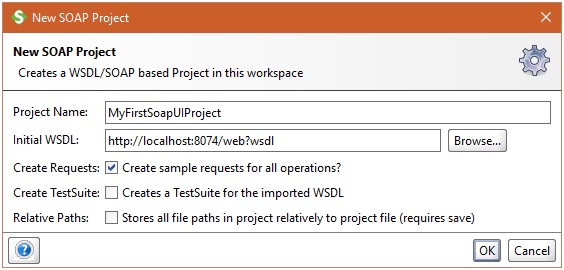
Step 2: Above step will open a new SoapUI project window as shown I below image which will accept below two details.
- Project Name as indicated below in diagram.
- WSDL file location for SOAP Web Service. This WSDL location was created after running the webservice project developed in the last tutorial “Web Service Sample Project and its Testing”. Use the URL for WSDL which was created in that web service project.
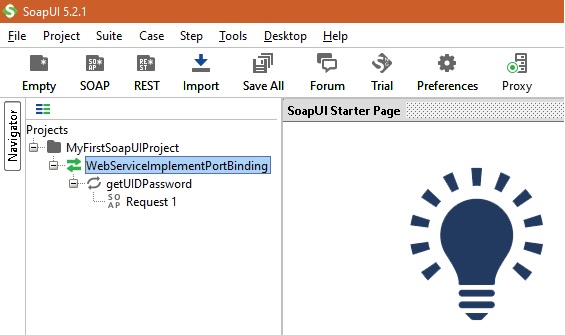
Step 3: Click OK, it will list down all the operations in the left window pane. Since the WSDL file that we are using has single operation as ‘’getUIDPassword’, it will display that operation there.
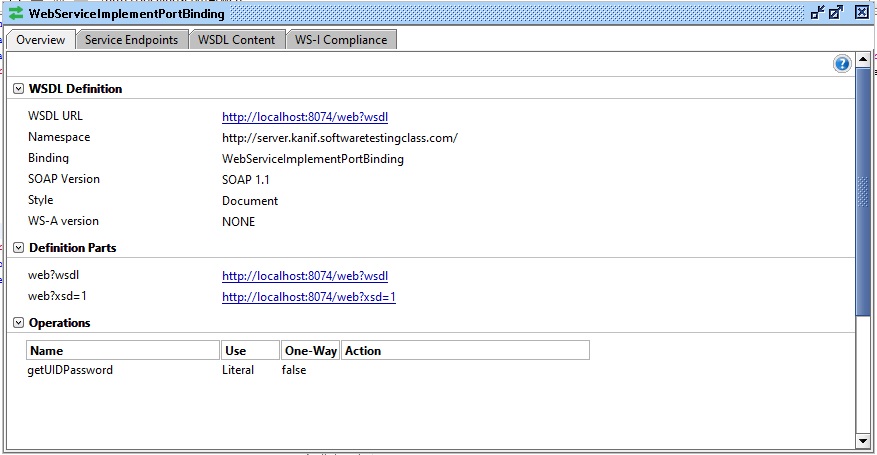
WSDL Description:
Step 4: Click on the “Request 1” link on the window pane on left hand side. Here a request and response instant test window will get open as demonstrated in the below Image. Here place the values in the arguments 0 to 4 in the left hand side window and trigger the start button, the response from web service will be visible on the right hand side window.
Steps to Prepare the Test Suite and Test cases with in the suite:
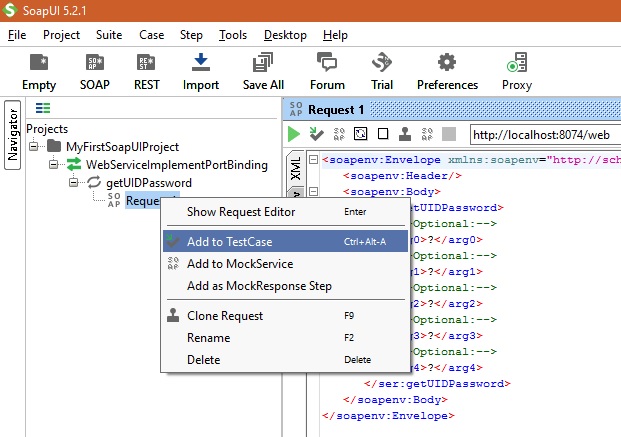
Step 1: Right click on the operation which was imported from the WSDL file and from the drop down window select “Add to TestCase”. It is demonstrated in the below image.
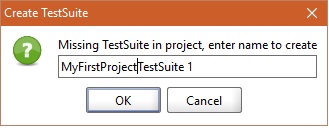
Step 2: After clicking “Add to TestCase”, a small window will be opened to create TestSuite where you can give this test suite a name. Below in the image given name is “MyFirstProjectTestSuite1”.
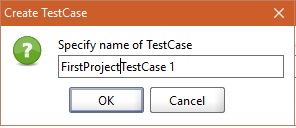
Step 3: After click Ok button of TestSuite window, another window will pop up asking to specify TestCase name. Specify the desired name there and click on the ok button.
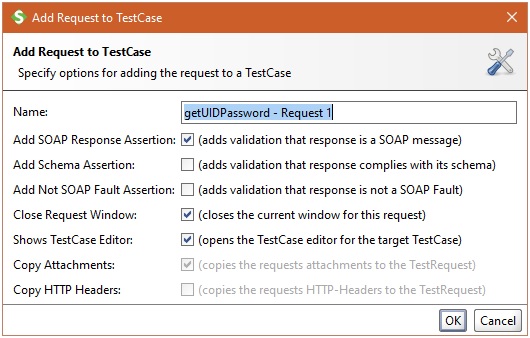
Step 4: Next pop up window will ask you to add WSDL request on which current test case is testing on. Under the “Name:” include the “getUIDPassword – Request 1”. Keep the checkboxes indicated below in the image as checked. This will allow to add SOAP Response Assertion, Close Request window after test and will open the TestCase editor for the target TestCase. Click on the OK button.
Up till now, we are familiar about how to use SoapUI interface to create a SOAP project, add a web service operation in it. On the operation how to add a test suite and the test cases with in the test suite. Now let’s work on preparing the complete test suite for SOAP Web Service project.
First Project Test Case 1:
In the last tutorial, we prepared a web service which accepts input details of the customer such as name, phone number, email Id, address and account number. If these input details matches the details present in the Web Service, it responds with UID and Password else exception message. Therefore to test such operation in web service, we have two test cases one with valid test string input set and other with Invalid test string input set as shown below:
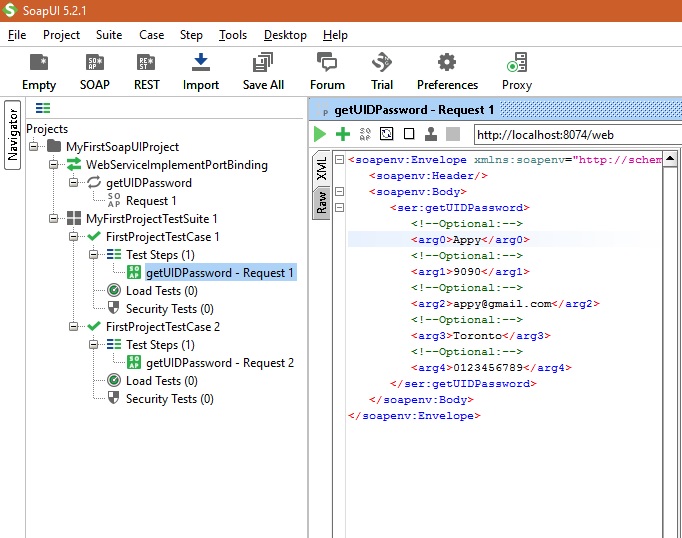
Valid Test String:“Appy”, “9090”,”appy@gmail.com”,”Toronto”,”0123456789″.
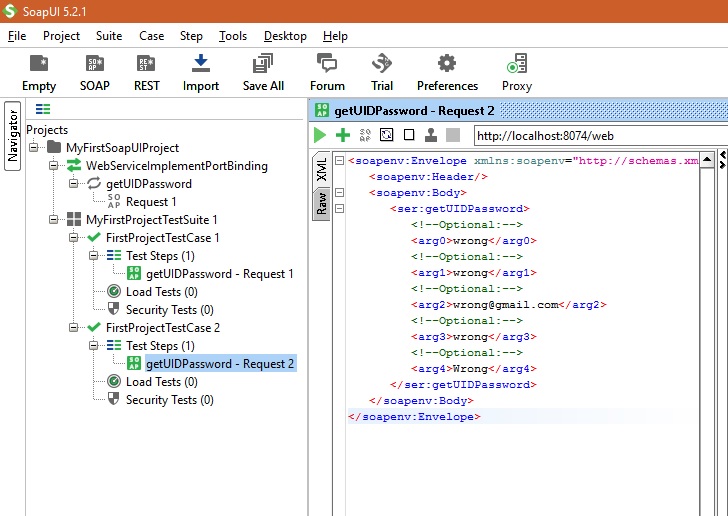
Invalid Test String: “wrong”, “wrong”,”wrong@gmail.com”,”Wrong”,”0123456789″.
Like any other testing let’s prepare the test case first as shown below:
| Test Case ID | Description | Input Value | Response Output |
| WS1 | Valid test case, if this string is passed as “Appy”, “9090”, “appy@gmail.com”, “Toronto”, “0123456789”. | “Appy”, “9090”, “appy@gmail.com”, “Toronto”, “0123456789”. | XML format message with response as “UID and Password successfully created. UID: SoftwareTesting Classes; PWD: Let’sLearn”. |
| WS2 | Valid test case, if this string is passed as “wrong”, “wrong”, “wrong@gmail.com”, “Wrong”, “0123456789”. | “wrong”, “wrong”, “wrong@gmail.com”, “Wrong”, “0123456789” | XML format message with response as “Input data does not match the details requested, UID and Password not created”. |
Let’s work on test case WS1 in SoapUI “FirstProjectTestCase1” as shown in the below image. Here in the input XML SOAP message we have given the valid test string input arguments.
Test Response: If you individually run this Test Case, below SOAP XML message response will be visible on right hand pane. Since we entered all the valid arguments therefore we received the expected response as “UID and Password successfully created. UID: SoftwareTestingClasses; PWD: Let’sLearn”. This passed the test case.
First Project Test Case 2:
Next, let’s work on test case WS2 in SoapUI “FirstProjectTestCase2” as shown in the below image. Here in the input XML SOAP message we have given the invalid test string input arguments.
Test Result: If you individually run this Test Case 2, below SOAP XML message response will be visible on right hand pane. Since we entered all the invalid arguments therefore we received the expected response as “Input data does not match the details requested, UID and Password not created”. This passed the test case.
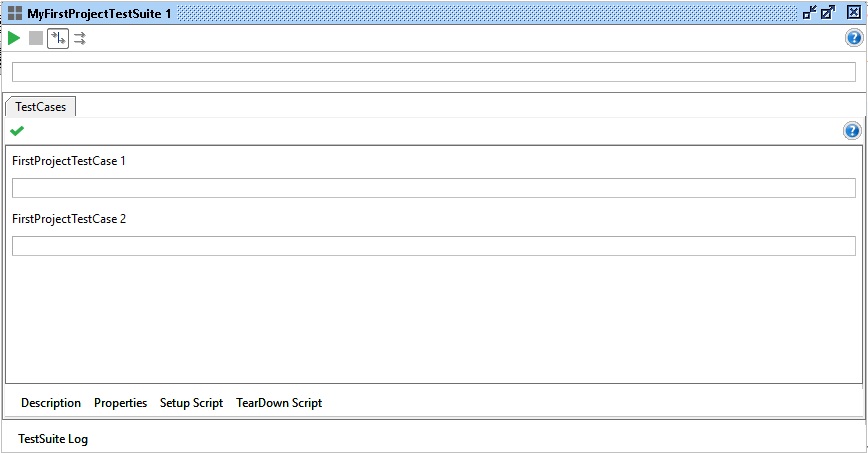
Test Suite 1: Let’s try to execute the entire test suite which has above two test cases. Click on the test suite “MyFirstProjectTestSuite1” and click the green arrow button, it will trigger complete test suite. Below image demonstrates when test suite prepares to get executed.
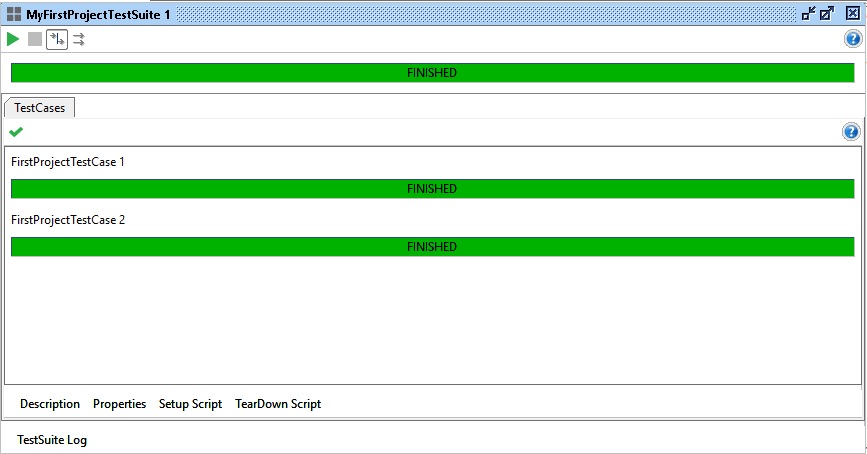
After completion of test suite execution, below screen will be visible. Since both test cases have passed successfully, entire test suite including the tests look green.
Test Suite Log: SoapUI tool provides the feature using which we can check the test suite log as shown in the below image.
Memory Log: SoapUI tool provides the feature using which we can check the memory log as shown in the below image. With this feature we can monitor the memory usage while executing the test suite.
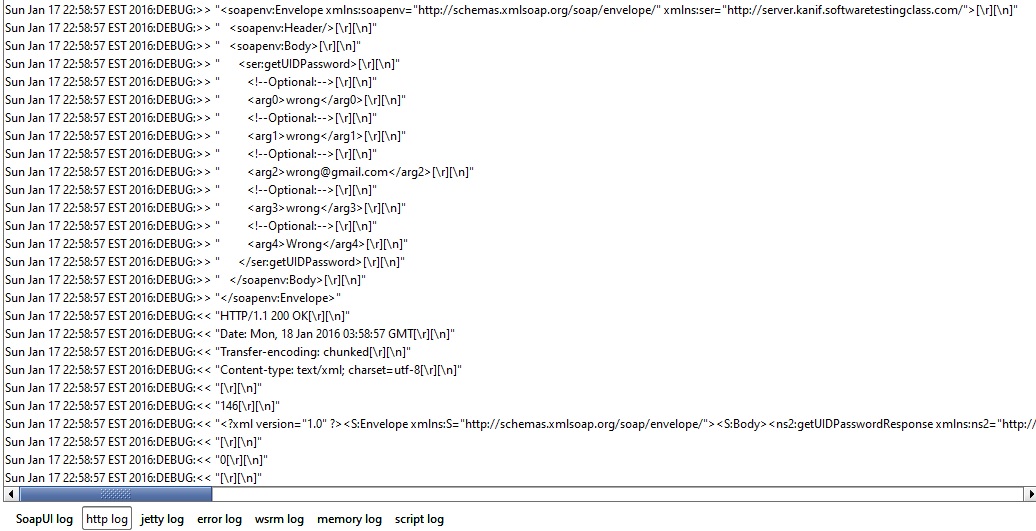
Http Log: SoapUI tool provides the feature using which we can check the Http log as shown in the below image.
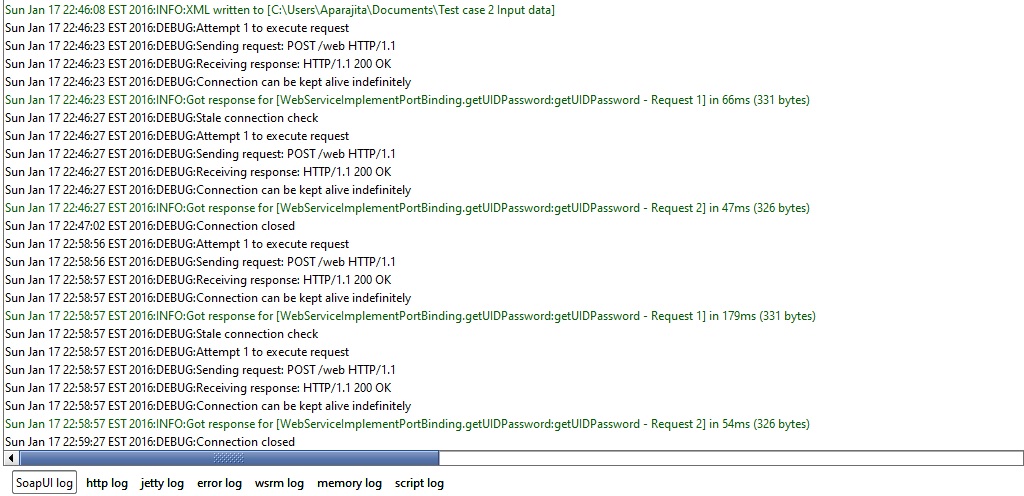
SoapUI Log: SoapUI tool provides the feature using which we can check the SoapUI log as shown in the below image. This will provide the step by step events that take place while making Web Service call.
Brief Introduction to Assertions:
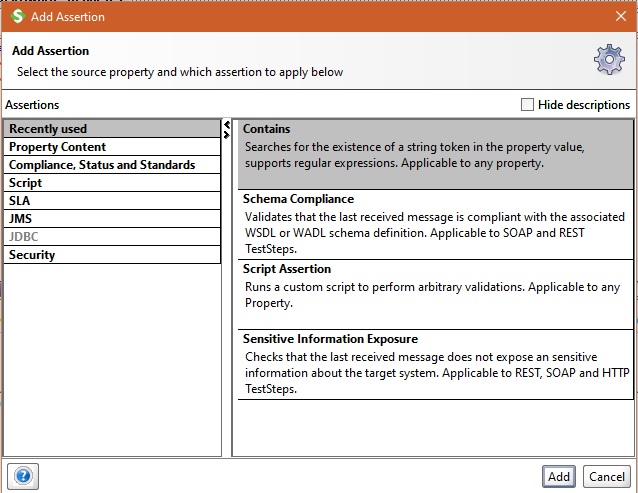
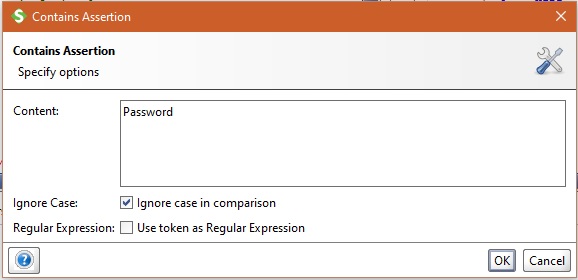
Click on the “Add Assertion” option which can be added to each test case, in this tutorial lets add assertion through which we can check “UID” and “Password” is present in the response message.
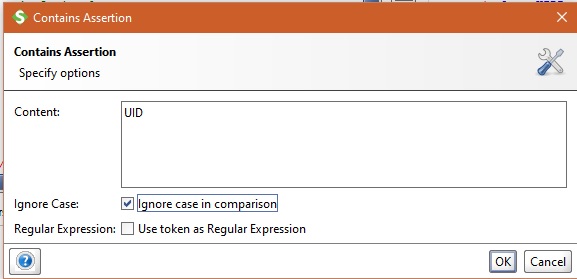
Here in the Content space add “UID” and check the checkbox for Ignore case. This will be an Assertion “Contains UID” added to the TestCase1.
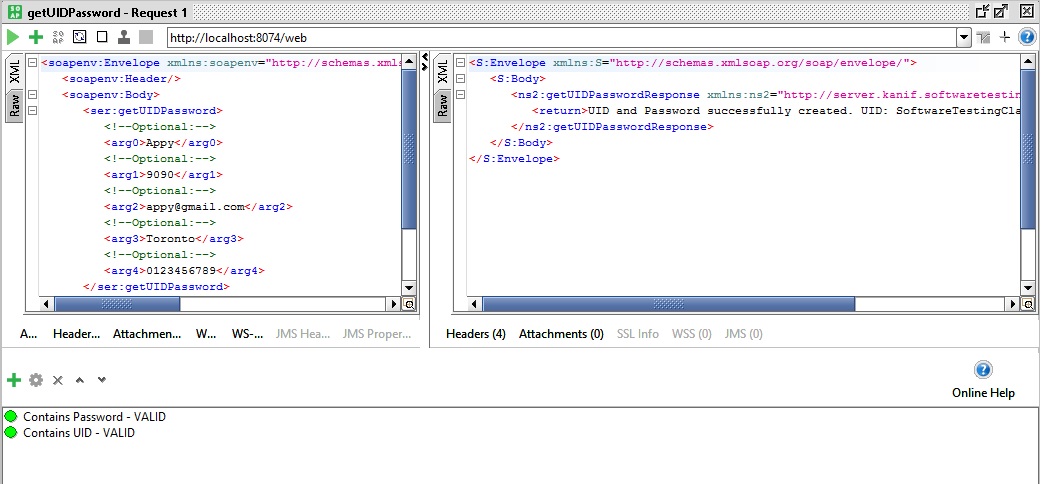
Similarly add another assertion “Contains Password” to the TestCase1 as indicated in below image.
Now run the TestCase1 and as we know the response message will have both UID and Password present in the XML message therefore both assertions are going to pass successfully and the output will look like as below.
Likewise there are following assertions available in SoapUI.
- Schema compliance: It validates the last received message as response is WSDL schema compliant or not. It is applicable to both SOAP and RESTful Web services.
- Script assertions: Runs a custom script to run arbitrary validations.
- Sensitive information exposure: This to make sure that the last response message does not contain any sensitive information about the target system.
⇓ Subscribe Us ⇓
If you are not regular reader of this website then highly recommends you to Sign up for our free email newsletter!! Sign up just providing your email address below:
Happy Testing!!!
- SoapUI Tutorial For Beginners [Full Series] – Introduction to SoapUI – Why SoapUI?
- Web Service Sample Project & Testing
- Simple Guide To Create Load Testing Using SoapUI
- What Is Web Service? How It Is Tested?
- Installation and Configuration of Soap UI – Complete Guide
- Mock Services Testing Using SoapUI
- How To Do Security Testing Using SoapUI?
- 10 Tips for the SoapUI Beginner
- How To Do Functional Testing In SoapUI?
- REST Testing using SoapUI
