Mantis Bug Tracker is a defect tracking tool used to report bugs and track them. The function of bug tracker starts right from reporting,
In this tutorial we will study the complete bug life cycle in detail.
Procedure For Logging Bugs In Mantis Bug Tracker:
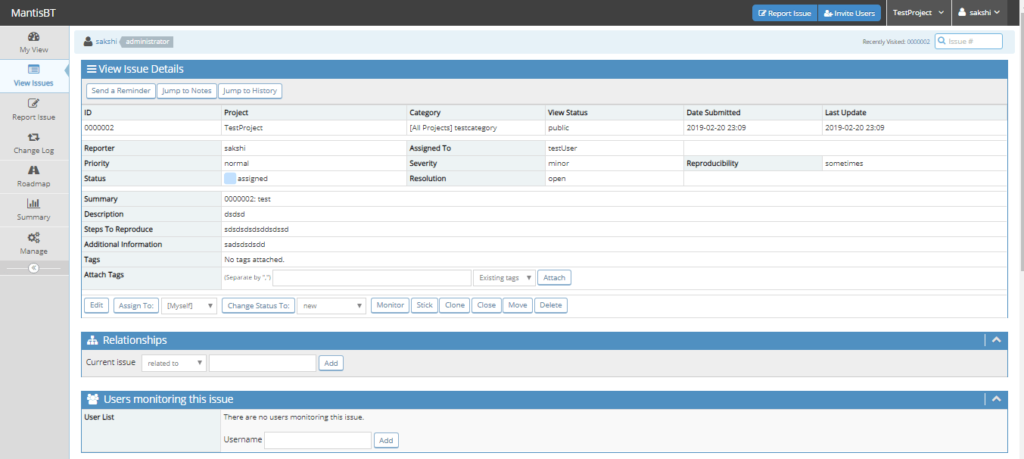

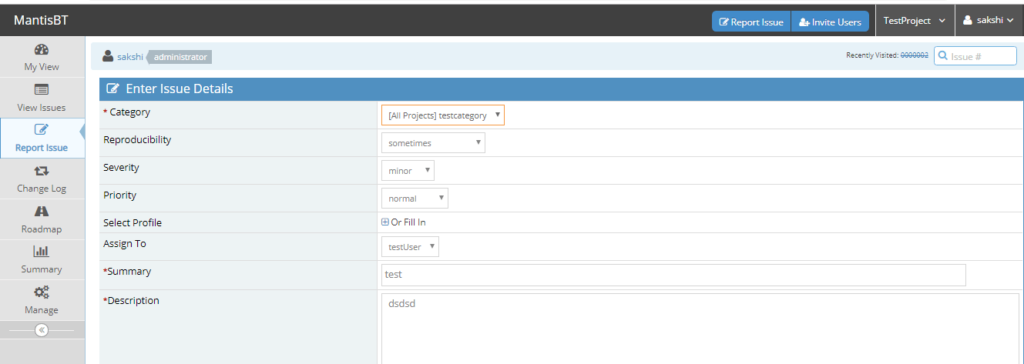
To report an issue:
- Go to the menu bar and click on “Report an Issue”.
- Fill in the details and click on submit an
issue . - On successful submission, an issue id is auto-generated with default status as “New”.
- Status of an issue tells about the stage where the reported bug has reached. As a new issue is reported, the status assigned by the system will be new.
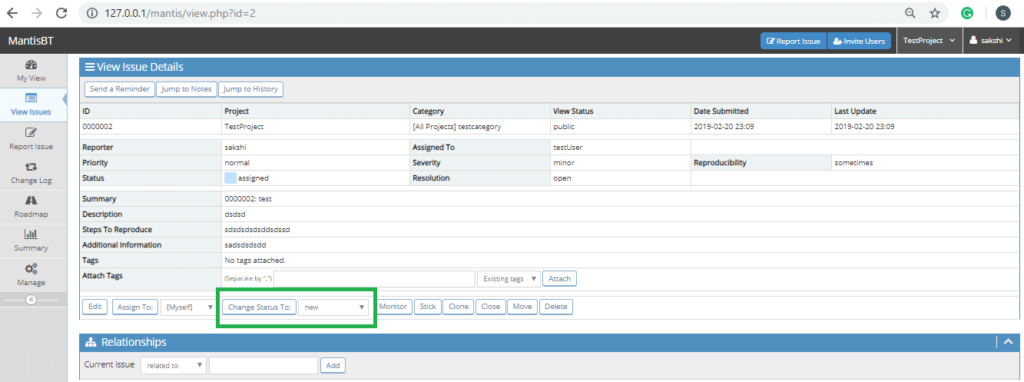
The various status options available to the tester are:
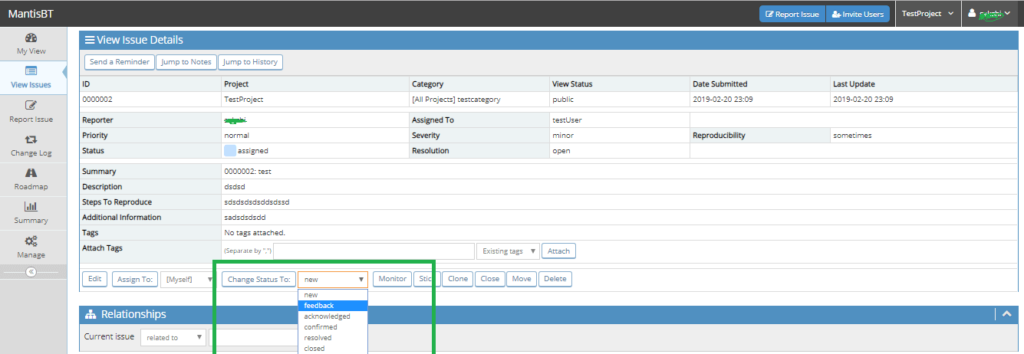
- New: This is the first status assigned to a bug when it is reported.
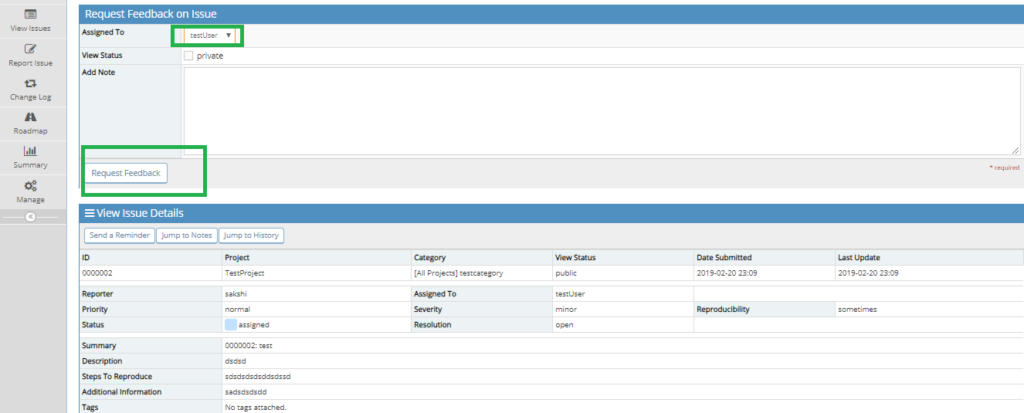
- Feedback: If the user wants some information about the bug, then he may opt for this status. On selecting feedback, the user will have
option to add any bug notes such as any noted related to the issue or the project.
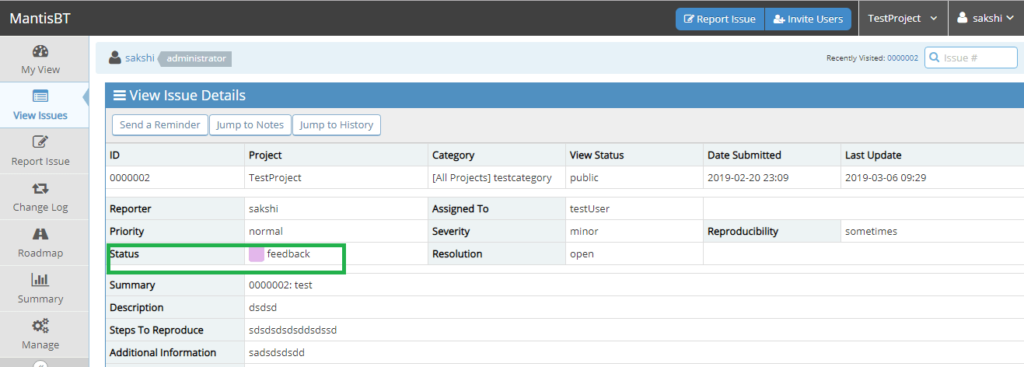
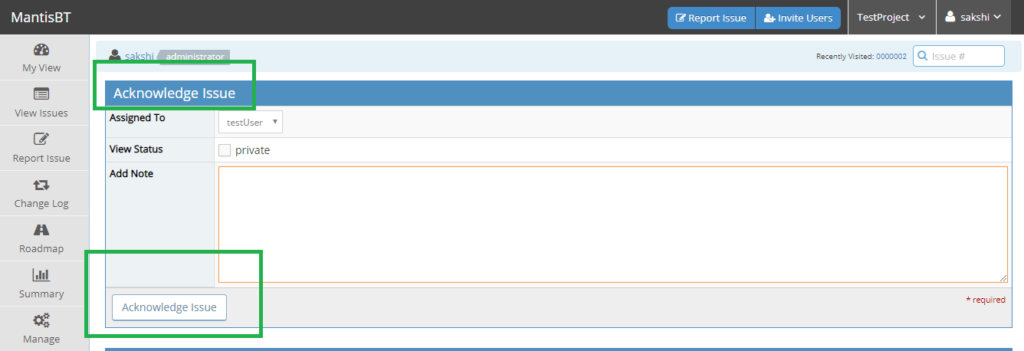
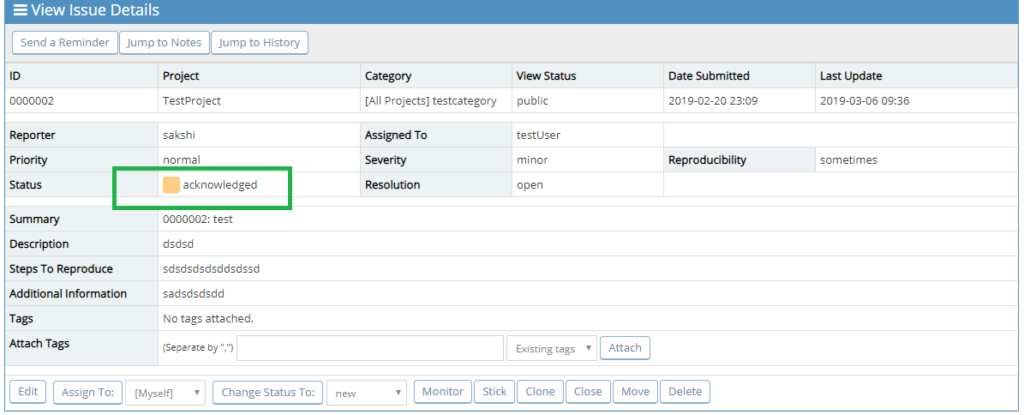
- Acknowledged: The status acknowledged is set when the reported bug is checked by the assigned person. To communicate the acceptance of bug by the developer, this status is selected.
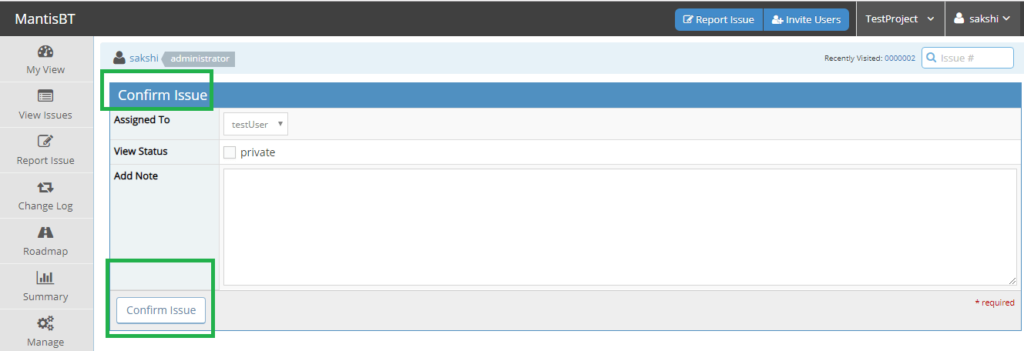
- Confirmed: Confirmed status is generally used to denote the issue is reproducible and present in the application.
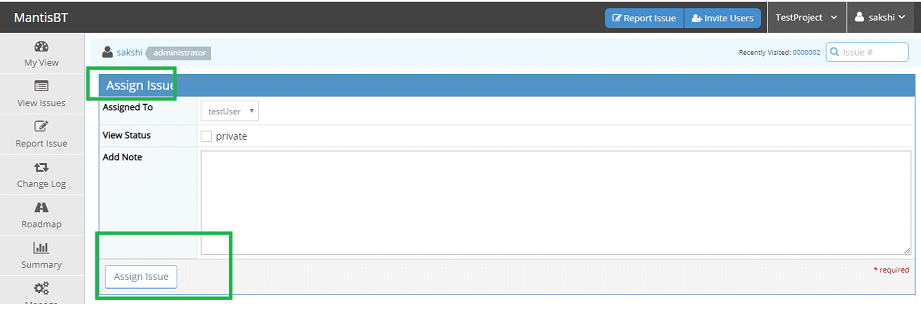
- Assigned: This status is used to denote that the bug is assigned to the concerned person for resolution. This status is chosen when the bug is assigned to the
correct developer who is working on the bug to resolve it.
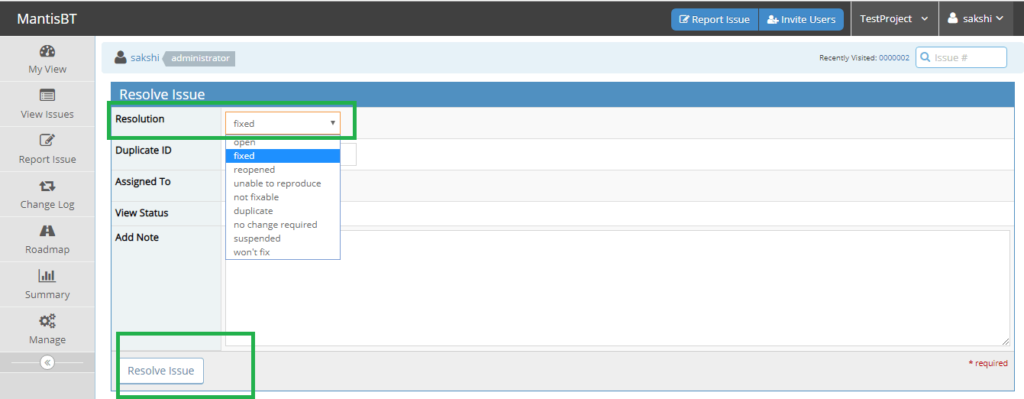
- Resolved: The status is set to “Resolved”, if it has been considered by the developer. The status will tell the tester that the issue is resolved by the development team. By resolved, the development team will assign back the bug to the tester. When the status is changed to resolved, the next page will show :
- Resolution: Type of resolution done to the bug. The bug could be:
- Fixed: The functionality is corrected
- Open: The bug is open and with the development team
- Unable to reproduce: The steps cannot be reproduced
- Duplicate: The similar bug is already raised
- No change required: There is no change in function
- Not fixable: The raised issue cannot be changed
- Suspended: The bug is not considered to be resolved
- Won’t fix: The bug will not be fixed in this release may be because of obsolete nature or functionality not present in this build.
- Reopened: The bug is resolved by the
developer but doesn’t meet the required function, he may reopen it. - Duplicate Id: The ID of the duplicate issue is added here.
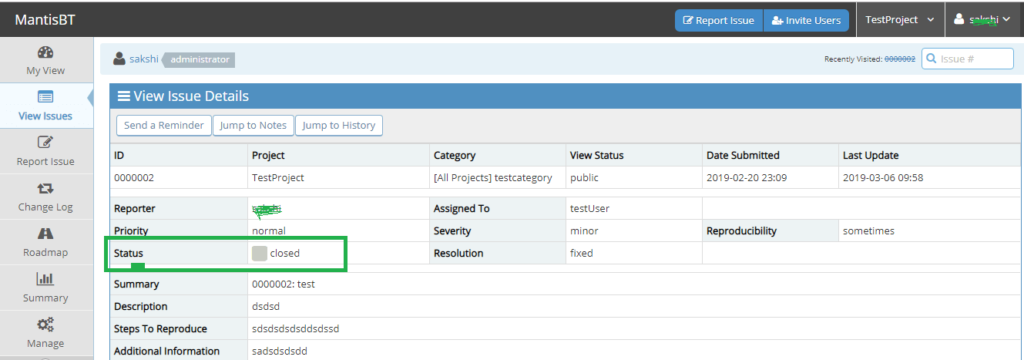
- Closed: This status is used when the bug doesn’t exist now. Either it has been resolved, verified and approved or closed due to some other reasons.
Other features on “View Issue” Page
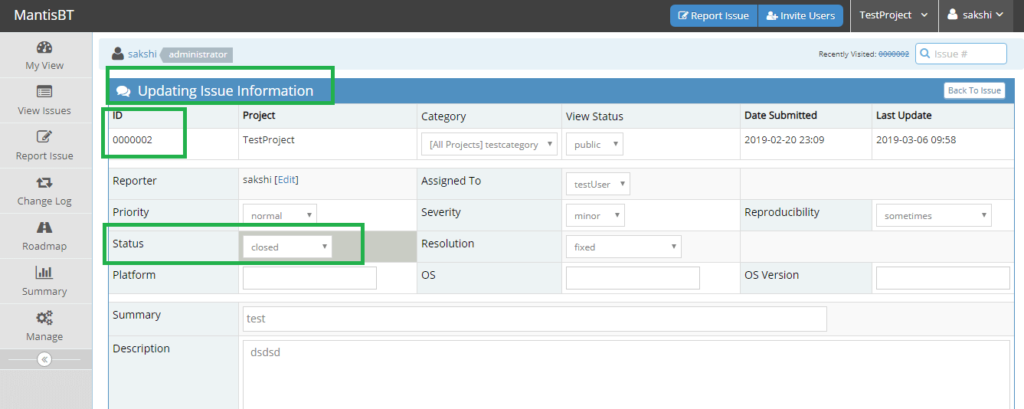
- Edit: The “Edit” function will open the window to update the bug. The user will be able to update all the fields related to a reported bug such as severity, priority, assigned to, reproducibility and so on. Also, the status can be changed. The user can add additional bug information here.
- Assign To: This tab will open a dropdown which show the list of all registered users on MantisBT account. The user can select any name and assign the bug to that person.
- Monitor: On clicking this button, will start monitoring the issue. The user can be added by adding the username in the section “Users monitoring this issue”. The monitoring issue users will receive an email notification to watch the changes related to bug
- Stick: The issue which is “stick” will be shown as first entries in “View Issues” Page.
- Clone: To clone an issue, issue details page will open which will show the options to add another issue.

- Reopen: This is a status change to reopen a closed/resolved bug.
- Move: To move the issue to another project. The user can check multiple issues and move them together to a project
select ed from the dropdown. - Delete: To permanently delete an issue. It will verify whether the user wants to delete the checked issues.
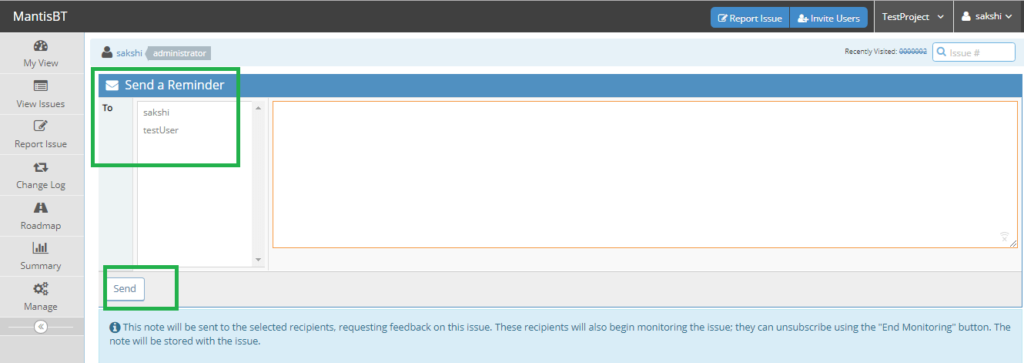
- Send a Reminder: To send a feedback request to selected recipients. These recipients will also begin monitoring the issue; they can unsubscribe using the “End Monitoring” button. The note will be stored with the issue.
- Jump to Notes: To add notes to the bug and also attach any relevant files.
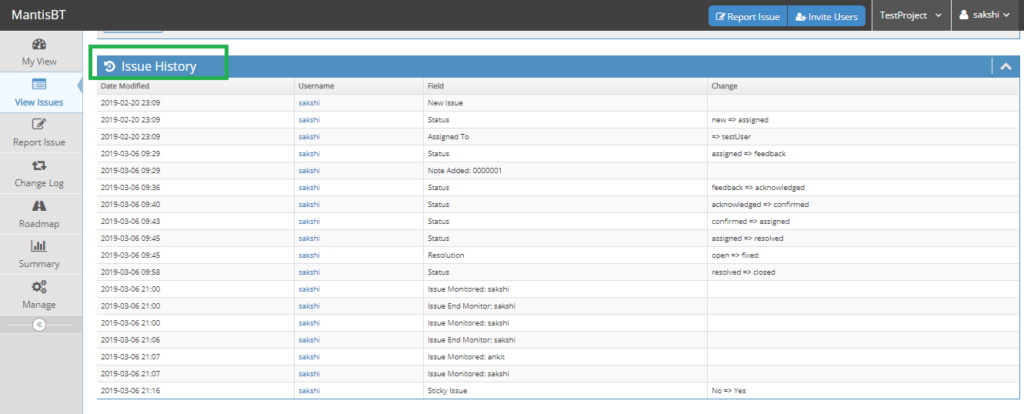
- Jump to History: To view the issue history.
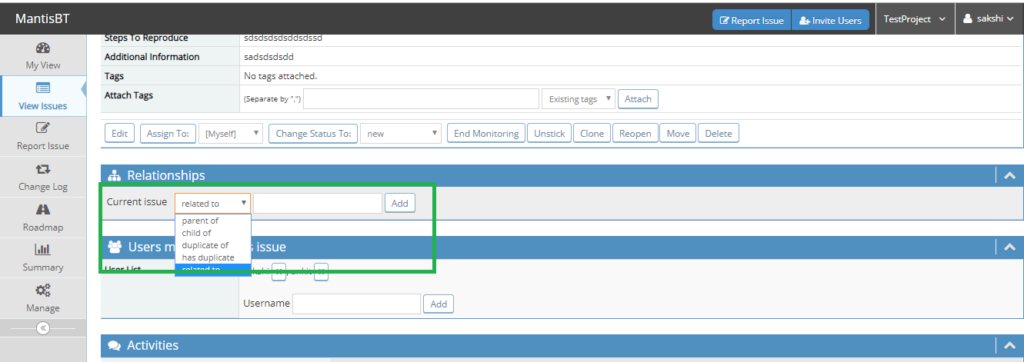
- Relationship: The current bug can be related to another bug by adding its Id in the textbox. It can be related to, parent to, child of, duplicate of.
Bug Life cycle in Mantis Bug Tracker:
The normal workflow for bug lifecycle in Mantis Bug Tracker is as below:
- When a new issue is reported, the default status is set to “New”.
- It is assigned to a person from “Assigned To” dropdown.
- The assigned person will receive a notification to an issue assigned to him.
- The assigned person will open a bug and go through it details.
- It will acknowledge the bug or
- Ask for any feedback.
- Confirm the bug and set the status
- If the bug is confirmed and set to open, the status will be set to “confirmed” and the assigned developer will start resolving the bug.
- If the bug is resolved, the status will be changed to “Resolved” and status “fixed” is set by the developer.
- The resolved bug will be assigned back to the tester for verification and retesting.
- The retesting of the bug will be done by the tester. The tester
- Will assign and reopen the bug to other
- Will close the bug
- The other status can be used appropriately.
- All the activities related to the bug will be logged in Issue History and Activity Section of the View Bug Page.
Conclusion
Mantis Bug Tracker bug lifecycle has a very easy and user friendly work flow. It give the testers and developers many options to explain the bug details in apt way. The status of the bugs are an easy way to track the bug. The status fields are customizable also. Various features such as Monitoring, Cloning are exclusively available in MantisBT.
⇓ Subscribe Us ⇓
If you are not regular reader of this website then highly recommends you to Sign up for our free email newsletter!! Sign up just providing your email address below:
Happy Testing!!!
- Tutorial #1: Introduction to Mantis Bug Tracker
- Tutorial #5: Project Management in Mantis Bug Tracker
- Tutorial #7: Mantis Bug tracker account management
- Tutorial #2: Features of Mantis Bug Tracker And User Interface
- Tutorial #3: Installation of Mantis Bug Tracker on Windows
- Tutorial #4: Getting Started with Mantis Bug Tracker
- Tutorial #9: Mantis Bug Tracker: Other functionalities
- Top 10 Free Open Source Bug Tracking Systems
- 10 Tips of Writing Efficient Defect Report
- Bug Life Cycle in Software Testing

