In this Jira tutorial series, we are going to discuss and learn about Atlassian JIRA tool – Issue And Project Tracking Tool, which is a very popular bug tracking tool used widely by leading IT software companies across the globe. JIRA provides defect tracking and different project management functions.
Note: Looking at the number of topics, the frequency of publishing the Atlassian Jira tutorial series will be a bit more than regular articles. If you miss any article the please refer below the consolidated list.
In this series we are planning to cover the following tutorial:
Tutorial 1 – Introduction to JIRA, an issue, and project tracking tool
Tutorial 2 – Download and Installation of JIRA tool
Tutorial 3 – Working with Issues in JIRA
Tutorial 4 – Issue Management, workflow, and Reporting feature
Tutorial 5 – Working with Epics in JIRA
Tutorial 6 – Working with Sprints in JIRA
Tutorial 7 – Planning a version in JIRA
Tutorial 8 – Creating, using and configuring aboard
Tutorial 9 – Creating and working on sub-tasks in JIRA
Tutorial 10 – JIRA Agile Installation and Upgrade Guide
Tutorial 11 – JIRA Agile Tutorials in Managing Agile Projects
Tutorial 12 – Using the JIRA Agile gadgets
Tutorial 13 – JIRA Agile User’s and Administrator’s Guide
Tutorial 14 – Integrating JIRA Agile with your Confluence applications
Tutorial 1 – Introduction to JIRA, an issue, and project tracking tool
Before we understand the tool and its uses, let’s understand why we need such a tool in the first place?
Consider a real-life work scenario where we are working on an issue and we need to convey its progress to the team. How this can be done? An easy way that comes to our mind is through email chain but if we think in a practical and convenient way then is this going to work? What about the tracking reference and information visibility to the required people? Is email really a structured approach of keeping all the important information on an issue in one place? What if somebody lost the track of the history and miscommunication happened within the email?
These are some of the flaws that we encounter with such practice and then comes a need to keep the track of issues in a word or excel document but again there is a hurdle of check-in and check out and risk of information overridden within the team. Keeping all of above hassles in our work life for issue tracking or project management there arise a need of such a tool where we can track, limit and expand the audience, no danger of information loss due to check-in and check-out of documents, clear structured approach with proper workflow and no miscommunication of information about any issue. Here in this tutorial, we are going to learn about such a tool known as Atlassian JIRA.
Features of JIRA Tool:
- JIRA tool is written in Java language that uses Pico inversion of control container, WebWork 1 technology stack, and Apache OFBiz entity engine.
- JIRA supports SOAP and REST protocols for the remote procedure calls.
- JIRA is capable to integrate itself with Subversion, Git, Clearcase, Team Foundation Software, Mercurial and Concurrent Versions System (CVS).
- JIRA content can be presented and translated into English, French, German, Japanese, and Spanish languages.
- Back end database supported is MySQL, PostgreSQL, Oracle, and SQL Server.
Product Licence and Free Trial:
- JIRA is a commercial product and it requires a licence.
- JIRA provides free community licenses for open source and academic projects.
- JIRA is a free product for organizations that fall under non-academic, non-commercial, non-governmental, non-political, non-profit, and secular categories.
- 7 days of free trial is available to the individual user.
JIRA Users:
- JIRA is widely used by the project development team to track the effort spent on each issue and its workflow.
- JIRA is also used by the help desk team to track the ticket created and its resolution.
- JIRA is used as a tool to track the incidents in incident management and issue management.
JIRA tool can be used to create and track an issue or an incident as an issue before we get into JIRA how to do that let’s first take an overview on issue management in production support.
Issue Management:
1. Like any ticket creation, an issue or incident should be created.
2. An issue ticket or issue should have a unique identification number.
3. To the issue ticket, summary and available information need to be added which should be well structured and easy to understand.
4. As the issue ticket progresses, its status should be changed until it is completed or closed.
5. All the steps taken as the status of a ticket changed should be well defined and documented.
6. An issue may be linked to other issues or incident tickets as well.
7. It may be required to group all the resembling issues together for their resolution.
8. The required audience should be regularly informed and posted.
9. Comments and feedback can be recorded on the incident or issue ticket from ticket participants. Participants could be team member, testers, project managers, etc.
10. If a needed issue should be searchable with the required keywords.
11. Complete issue or incident report can be pulled if needed for senior management supervision.
All of the above-mentioned activities for issue or incident management could be achieved using the JIRA tool.
Let’s try to work on a problem ticket using the JIRA tool. JIRA in its entirety has a number of projects and each project has issues. Issues can be something that needs to be worked on. It could be a problem ticket due to production defect, incident ticket or new development task. Next part in the workflow which tracks the change of ticket or issue status as the work gets completed.
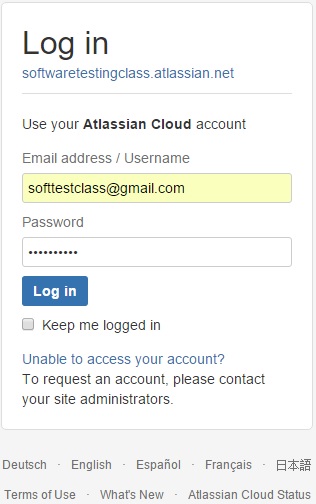
Step 1: Log into JIRA after entering your credentials.
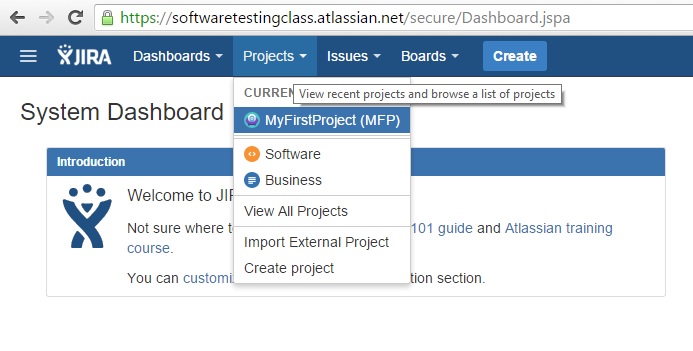
Step 2: Select the project to be worked on. Click on the Projects dropdown menu, it will display all the projects.
Step 3: Next is to create an issue within the project after clicking the Create issue button as shown in the below screenshot.

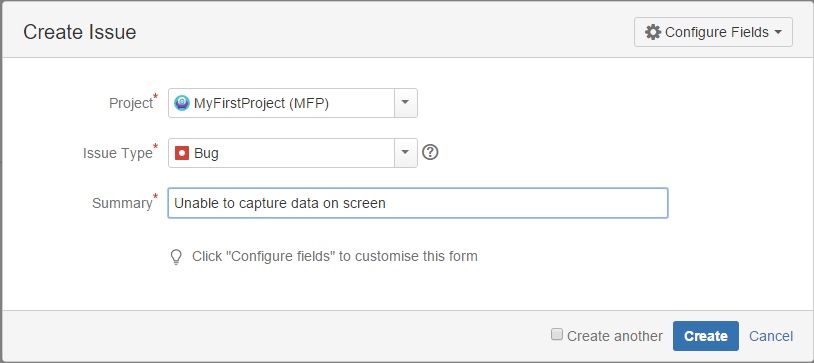
Step 4: This will open up create issue dialogue box where you can enter a summary title for the problem ticket. Also, we can choose the issue type (here it is Bug). Click on the create button to create the issue.
Step 5: This will create an issue with a unique identification number. In order to enter the available information associated with the issue, choose the issue as MFP-1 from the dropdown menu. It will give full-screen view as shown below.
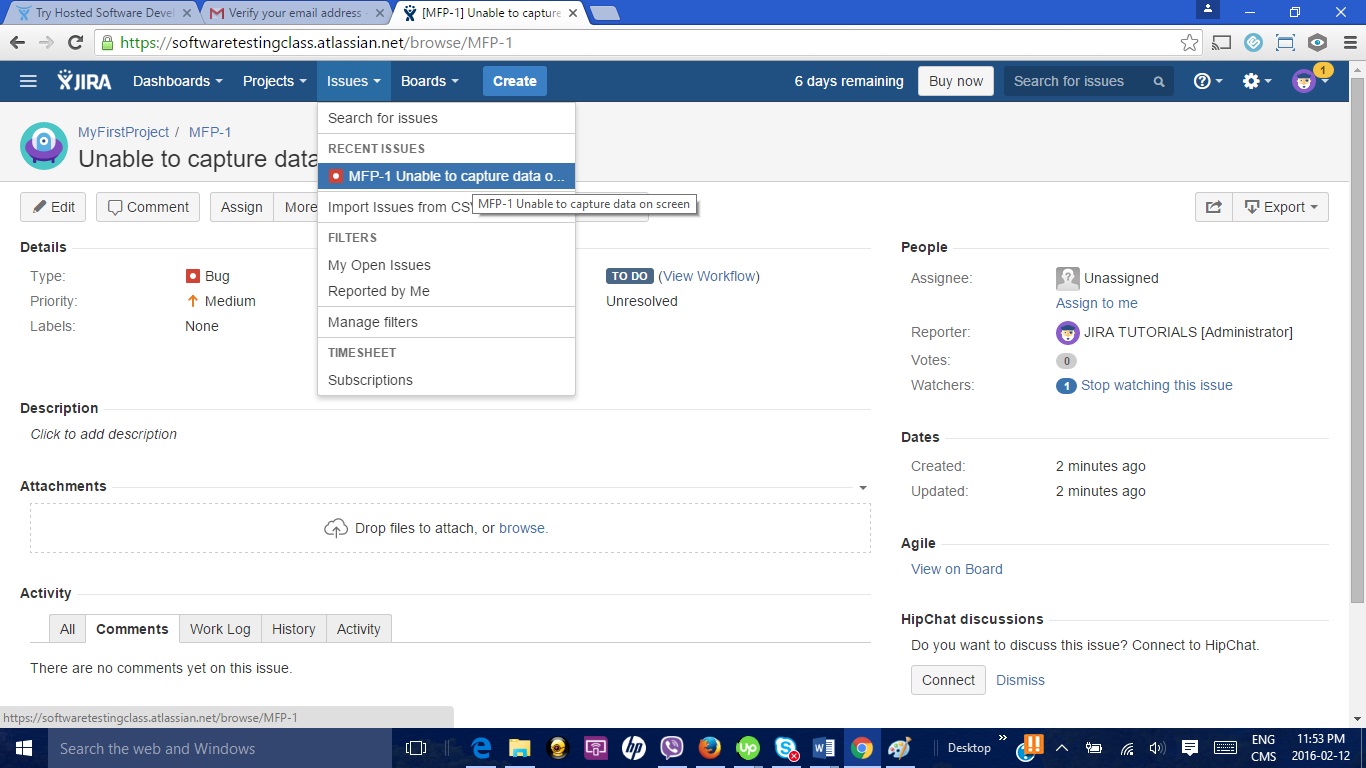
Step 6: Enter as many details as available, upload files or problem screenshot, assign the ticket to the assignee, add participants if needed, etc. It is very easy to save and update details without the entire screen to reload.
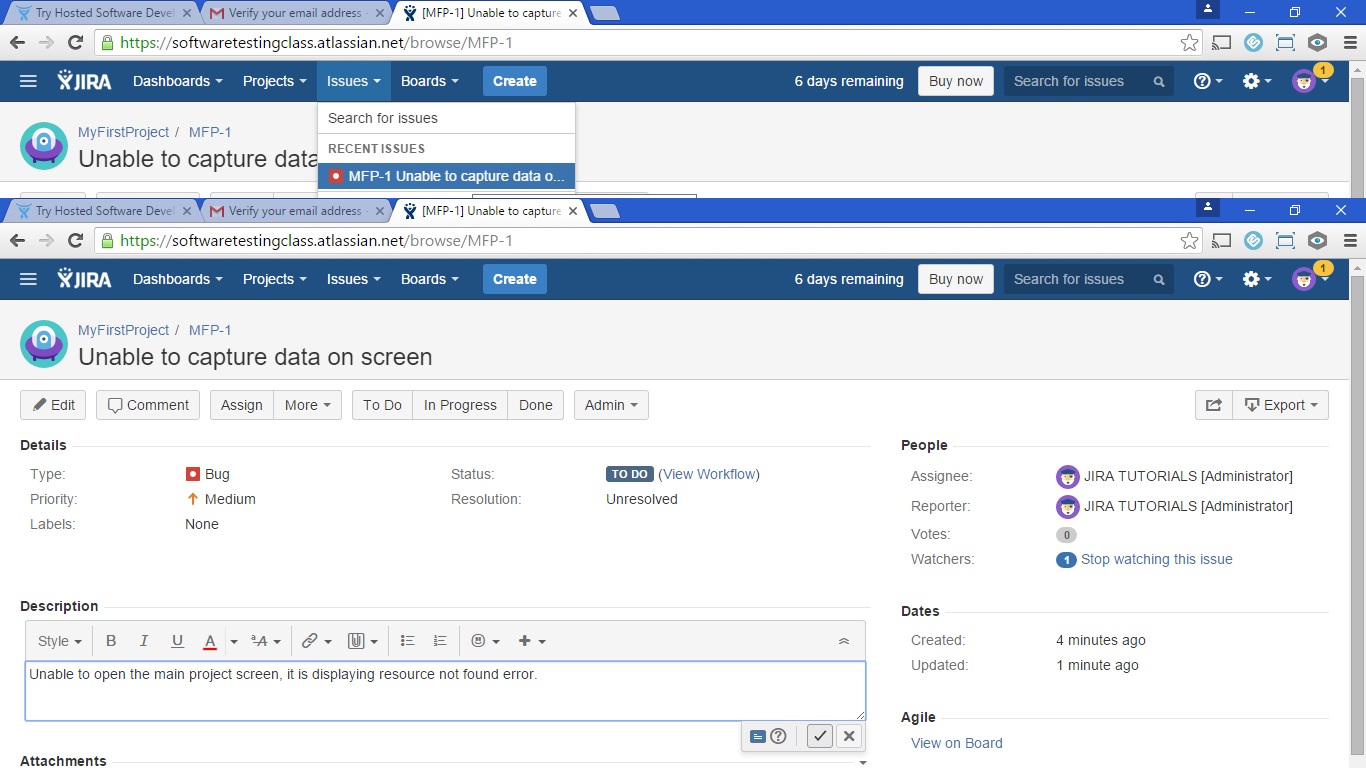
Step 7: Just one click on the button description can be added or updated. Using the comment button below participants of this ticket can comment on the progress and provide feedback. Also, there is a provision given to view the work log, history, and activity. Also as visible on the right-hand side, this tool tracks the time when this issue was actually created and updated.
So the ticket is ready and using this JIRA tool we can do all the operations required as a part of issue management or incident management as discussed before. This is just the introduction; later in this tutorial, we are going to discuss every possible feature of the JIRA tool in detail.
To start with the JIRA tutorial series we have seen an introduction to JIRA. In the coming article, we will see the download and installation of the JIRA tool. Meanwhile, you can ask your questions in the comment below.
- Working With Epics In JIRA – Tutorial 5
- Planning a version in JIRA
- JIRA Agile Installation and Upgrade Guide – Tutorial 10
- JIRA Agile Tutorials in Managing Agile Projects – Tutorial 11
- Using the JIRA Agile gadgets
- Tutorial 5: Assigning Test Case To Test Plan In TestLink
- Tutorial 6: Create A User In TestLink And Assigning Roles
- Tutorial 7: Writing Requirements in TestLink
- Tutorial 8: Executing A Test Case In TestLink
- Top 15 Best Test Management Tools

11 thoughts on “Complete Atlassian JIRA Tutorial Series | Introduction To JIRA – An Issue And Project Tracking Tool Tutorial 1”
Thanks for the tutorial series. First article on jira test management tool is awesome.
I am very glad to see that you are publishing different tool tutorials like SoapUI, Jira. Can you share the articles on Selenium webdriver as well.
Keep up the good work!!
Thank you sir for detailed information on JIRA, looking forward many more articles on this.
Best,
Trunal
Hi,
If we are using Automation, then how we can log the issue.
Thank you in advance,
Richardson
In my company we are affording JIRA tool, can you please suggest any free defect tracking tool other than Bugzilla?
very nice and helpful. keep sharing this with us and also give knowledge of latest tool(demanding) in market.
Nice article about JIRA tutorial series.
In my company we just started using JIRA as issue and project tracking tool. Thanks for publishing the articles on JIRA tool where I can start learning this tool faster.
Hi STC,
I wanted to know about JIRA workflow and how we are creating in JIRA. It would be great if you give me the screens for the same.
Thanks,
Satish
This is very nice article for beginners like me. Thanks for your efforts!!!
Mayank Solanki
Hi,
Nice informative Blog related to jira tool. I loved how first article is written. Tunned on for next articles in this series.
Thanks,
Madhukar