Introduction
In the last chapter, we discussed how to create a user in Testlink and how this user can be assigned an appropriate role. In this chapter, we are going to discuss Writing Requirements in TestLink.
Steps For Writing Requirements in TestLink:
We can write requirements in Testlink after following these steps.
Step 1: Bring up the Testlink application
Open the XAMPP console and click on Start buttons for Apache Web Server and MySQL. After Apache Web server and MySQL database are started, you can see their status on XAMPP control panel as shown below. Apache and MySQL elements on XAMPP control Panel has turned green which demonstrate the port number.
Note: When you want to stop or restart the Apache Web Server and MySQL database, you can simply click on the Stop button to complete the required action.
Step 2: Login to the TestLink application with admin or appropriate role
Make sure that the role with which you are going to login into Testlink tool should have appropriate access to write requirements. Once Apache Web server and MySQL database are up and running, you can access the TestLink application at the below URL on your local machine.
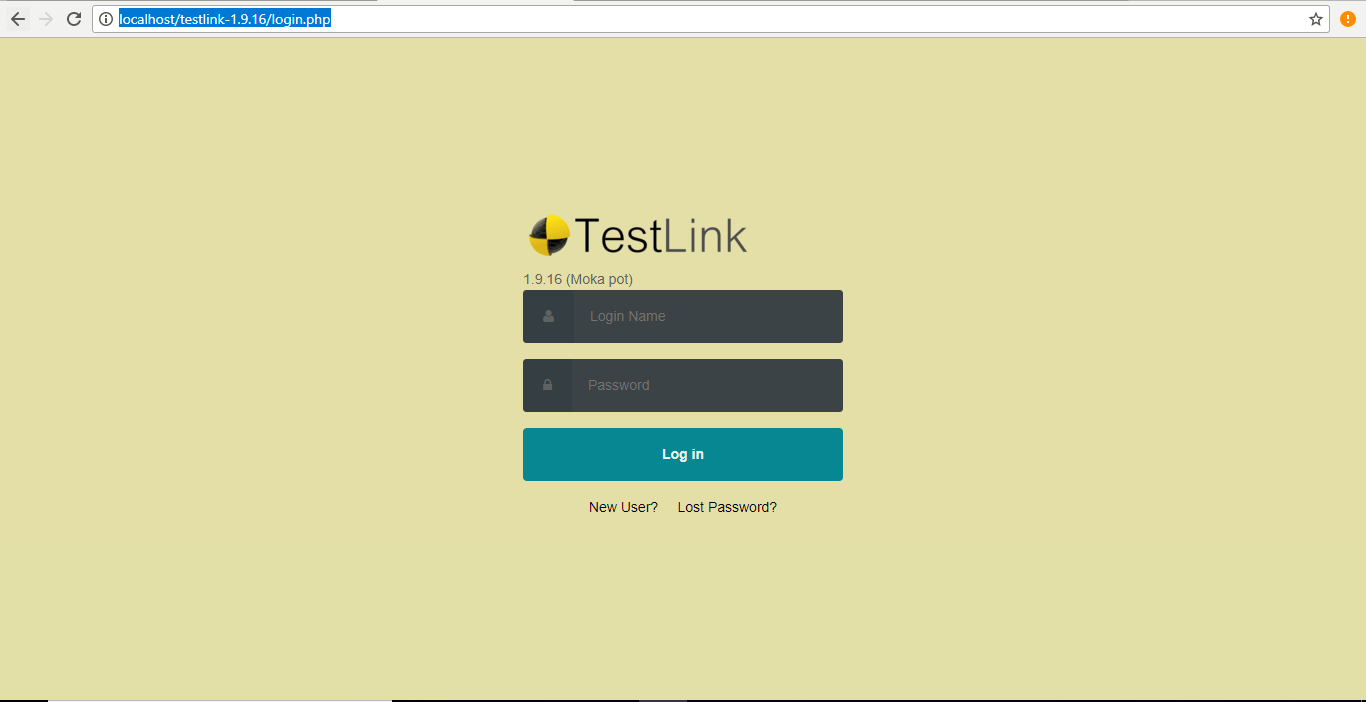
http://localhost/testlink-1.9.16/login.php
Shown below is the login page for TestLink tool. Enter username and password as admin and admin respectively in order to log into the application.
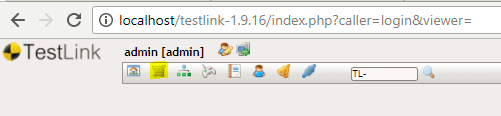
After successful login, it will take you to Test Project Management where you can access the requirement writing link as shown below.
Step 3: Click on the Requirement link (highlighted above). It will open up a requirement page as shown below.

Step 4: Click on the “Create” button present on the right-hand side panel. It will open up a form where you can fill up details in order to write a new requirement.
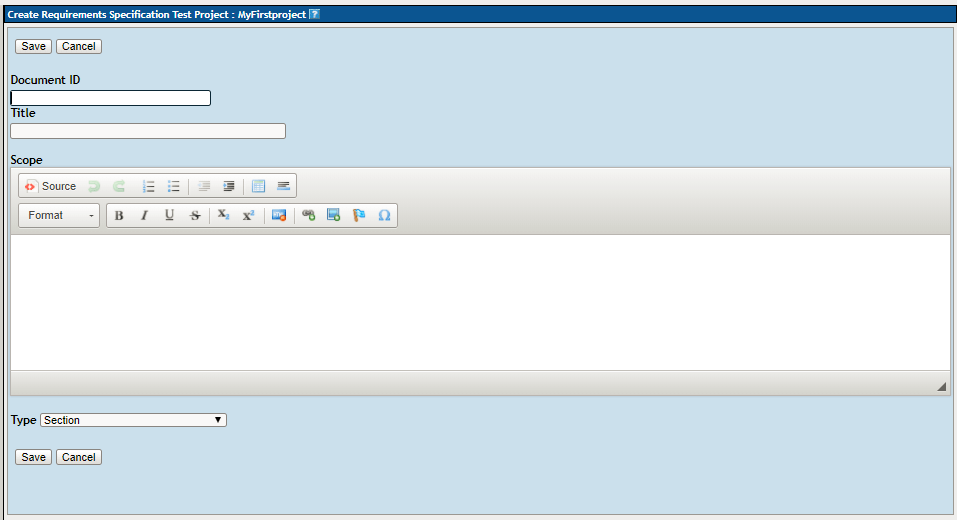
Step 5: Fill up the form which has the following fields.
- Document ID => Provide an appropriate ID to the requirement says “DOC1”.
- Title => Provide an appropriate title to the requirement.
- Scope => Specify here the scope of the requirement.
- Type => Select the requirement type. Available requirements types are ‘Section’, ‘User Requirement Specification’, and ‘System Requirement Specification’.
- Save button => When you want to persist above-entered details into the database, click on the save button to complete writing the requirement.
- Cancel button => If you have changed your mind and don’t want to proceed with above details for requirement then click on the cancel button.
Step 6: After clicking the save button, you will get the confirmation page that “Requirement Specification: New Requirement for Test Case was successfully created” as shown below.

On the left-hand side panel, you will notice that “DOC1: New Requirement for Test Case” has added under “MyFirstproject” hierarchy as shown below.

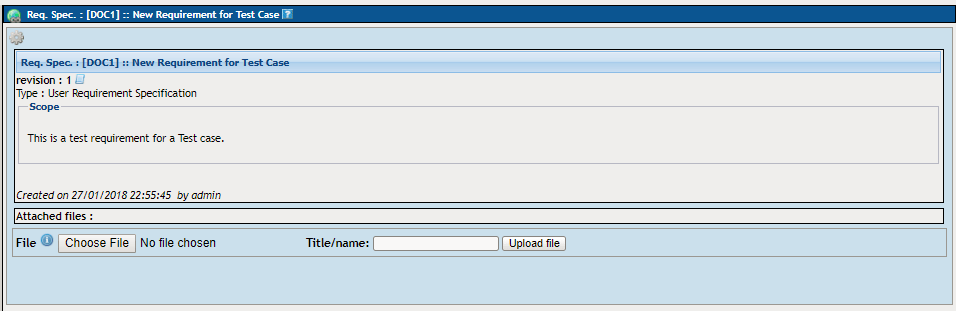
Step 7: Click on the link “DOC1: New Requirement for Test Case” present on the left-hand side panel. It will open up a new page on the right-hand side panel. This page has the complete detail about the requirement as shown below.
Step 8: Click on the settings button which is present in the top left corner of the requirements page. It will open up more buttons for requirement specification operations and Requirement operations as shown below.

Step 9: Click on the “Create” button present under Requirement operations heading. It will open up a new form as shown below.
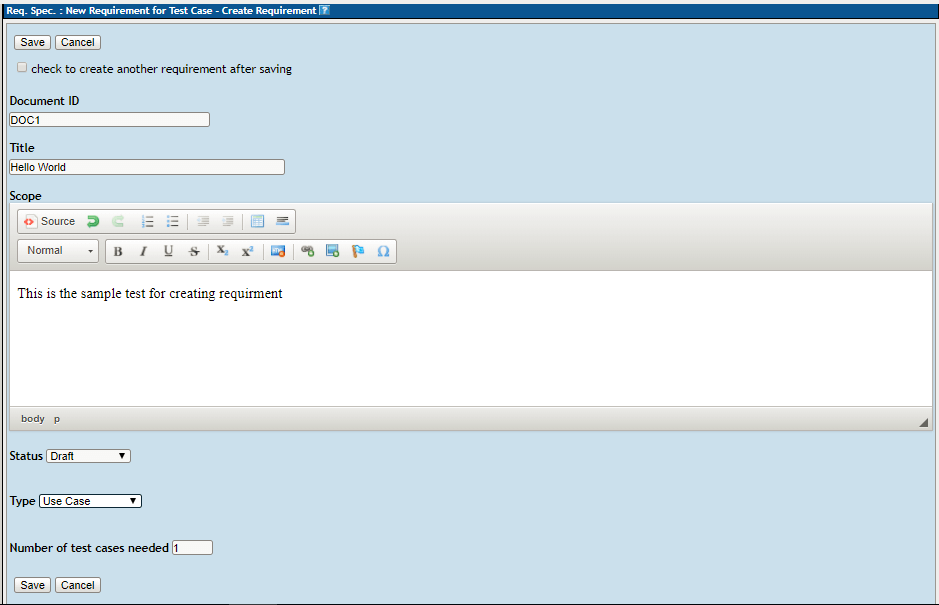
Step 10: The current form will ask you to fill out all the following fields and hit on the save button to persist the details.
- Document ID: Enter an appropriate document ID into this field.
- Title: provide an appropriate title by entering details into this field.
- Scope: Her you can enter scope as well as a complete description of the requirement.
- Status: You can choose from the drop-down menu and assign an appropriate status to the status field. The status available are draft, rework, review, finish, implemented, valid, not testable, and Obsolete. Here we have chosen “Draft” as Status.
- Type: You can choose the requirement type from the drop-down menu. The available options are Informational, feature, user interface, non-functional, constraint, and system function. Here, we chose “use case” as type.
- Number of test cases needed: Here can mention the number of test cases which are needed. Here, we have entered the number as 1.
- Click on the “Save” button in order to persist these details. In case, you have changed your mind then click on the cancel button to cancel the current form for requirement creation.
- This should be noted that in order to add more requirements, you may need to mark the check-box and click save button

Step 11: At this point, you can notice that on the left side panel, the requirement “DOC1: Hello World” has added successfully.

Step 12: You can click on the link “DOC1: Hello World” in the left-hand panel which will open up that requirement on the right-hand panel. Next click on the settings button which will display the set of a button as shown below.
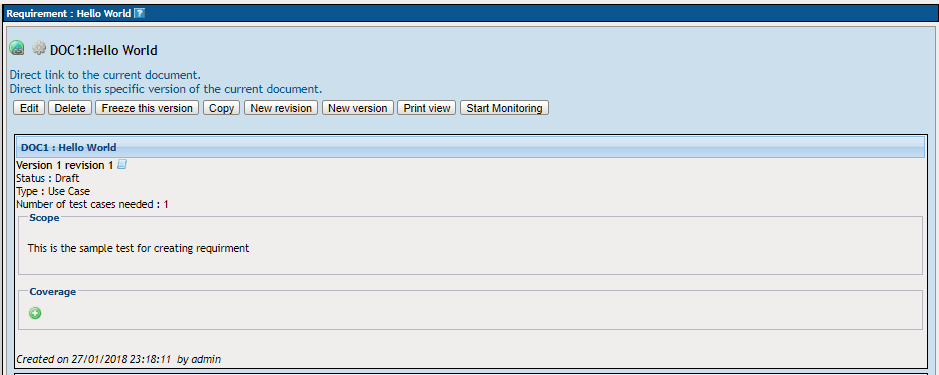
Using these buttons, we can perform the following operations.
- Edit: This button can be used to edit the content of the existing requirement.
- Delete: This button can be used to delete the current requirement.
- Freeze this version: If we want to freeze the current requirement then it can be made possible by hitting this freeze the version button.
- Copy: We can use this button to copy the current requirement into other documents.
- New version: This button can be used for creating a new version.
- Print view: this button can be used for print view operation.
- Start monitoring: This button can be used to start the monitoring of this requirement and associated test case.
Conclusion
In this chapter, we discussed the Writing Requirements in TestLink tool. We following the step by step approach in order to achieve this target in Testlink tool.
If you missed any of the articles then refer URL: FREE TestLink Training
If you are not a regular reader of this website then highly recommends you Sign up for our free email newsletter!! Sign up just providing your email address below:
Happy Testing!!!
