Hadoop can be installed on Ubuntu i.e. Linux as it is built on top of Linux Operating System. Installing earlier versions of Hadoop on Windows OS had some difficulties but Hadoop versions 2.2 and above supports its installation on Windows OS as well. In this chapter, we are going to cover step by step Hadoop installation on Windows 10 Operating System (version 2.7.3). Here, we are going to set up a pseudo-distributed single cluster with Data node, Name node, and Yarn which will be running on the same machine.
Hadoop 2.7.3 requires Java 1.8 and above. Therefore, first of all we need to install Java 1.8 on Windows 10. Given below are the steps to download and install Java 1.8.
Java 1.8 Installation Steps
Step 1: Browse the link given below on any Web browser.
Step 2: Scroll down the web page and find the link ‘dk-8u201-windows-x64.exe’ as shown below. Click on this link to trigger the download of JDK 1.8.0_161.
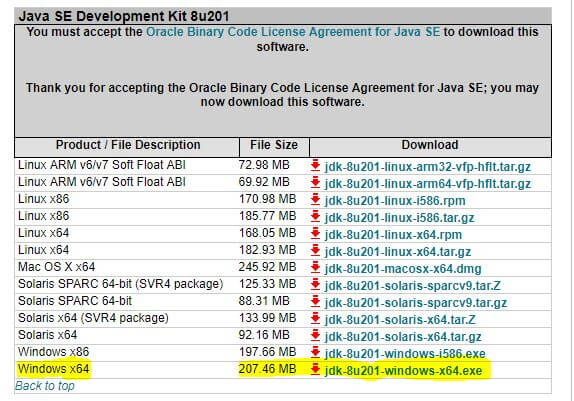
Step 3: Upon completion of download, double click on ‘dk-8u201-windows-x64.exe’ and follow the instructions of Windows installer to complete the installation of Java 1.8.0_161.
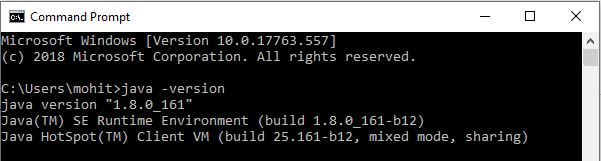
Step 4: In order to verify the Java 1.8 installation, open a windows command prompt and issue the command as ‘java -version’. The system will display the java version along with SE Runtime environment and Java Hot Spot Client VM details as shown below.
Download & Hadoop installation on Windows:
Step 1: Browse the link given below on any Web browser.
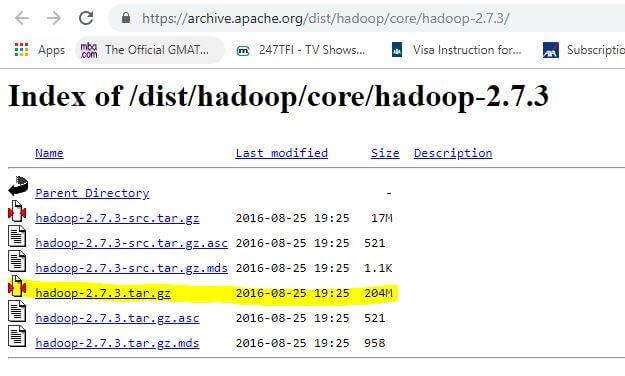
Step 2: On the web page, find the link ‘hadoop-2.7.3.tar.gz’ as shown below. Click on this link to trigger the download of this file.
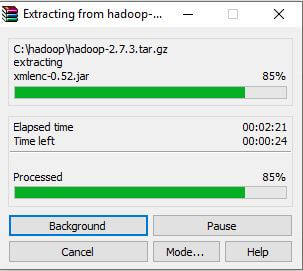
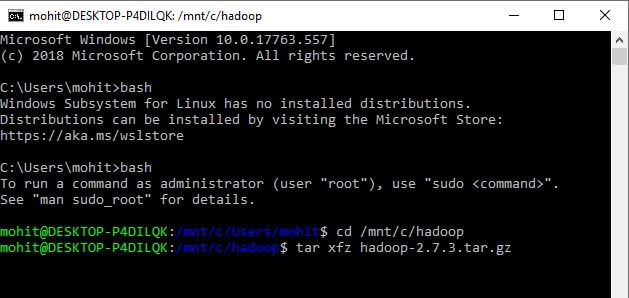
Step 3: After download of tarred Hadoop 2.7.3 file, we need to un-tar it on Windows 10. Use any windows tool and un-tar it at C:\hadoop on your PC.
Alternatively, you can open a Windows command prompt and Type ‘bash’, and you should notice something like this as shown below.
Note: In case the Bash is not installed on your Windows 10 then follow the following instructions in order to install Bash shell on your Windows 10 PC.
- Open Settings, click on ‘Update & Security’, next click on ‘For Developers’, and under “Use developer features”, to choose the Developer mode option in order to setup the environment to install Bash on your Windows 10 PC.
- A dialogue window will appear that will ask you to click on ‘Yes’ in order to turn on developer mode. After installation of the components, you need to restart your PC.
- After your PC restart has completed, you need to open the Control Panel, click on Programs, next click on Turn Windows features on or off, and finally check and click OK ‘the Windows Subsystem for Linux (beta) option’.
- Once the components are installed on your computer, click the Restart now button to complete the task.
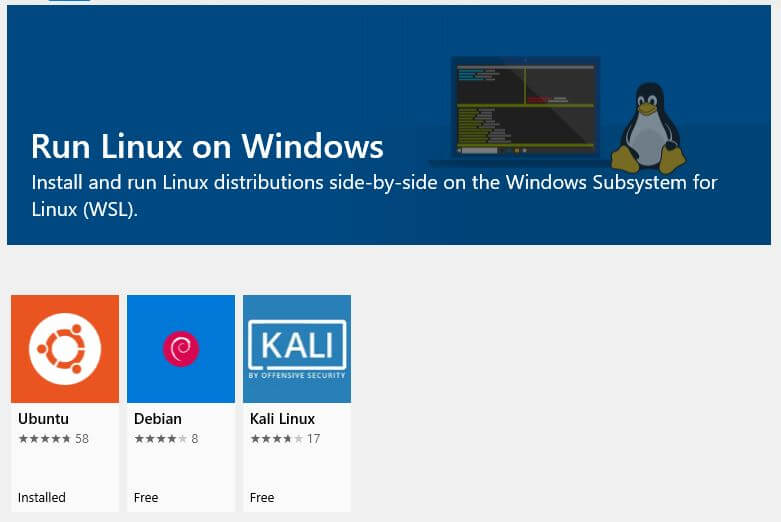
- After your computer restarts, just open Start, and do a quick search for bash.exe, and press Enter to open the command prompt. Next, you need to download and install Ubuntu from the Windows Store by browsing https://aka.ms/wslstore, as shown below.
- Once installation has completed, then create a default UNIX user account after that close the “bash.exe” command prompt and you are all set.
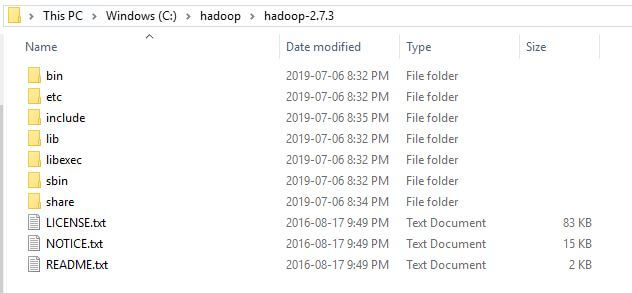
After un-tar of ‘hadoop-2.7.3.tar.gz’, you will notice the following files and folders at C:\hadoop\hadoop-2.7.3 as shown below.
Hadoop and Java Configuration
Step 1: After installing Java 1.8 & Hadoop 2.7.3, we need to set JAVA_HOME, HADOOP_HOME and append the PATH of bin of both Java and Hadoop as shown below.
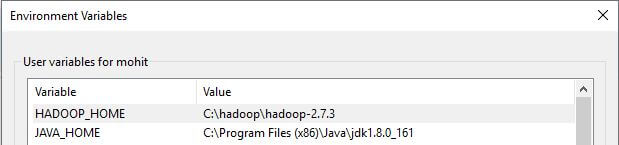
Step 2: Next, you need to append the bin paths of both as shown below.

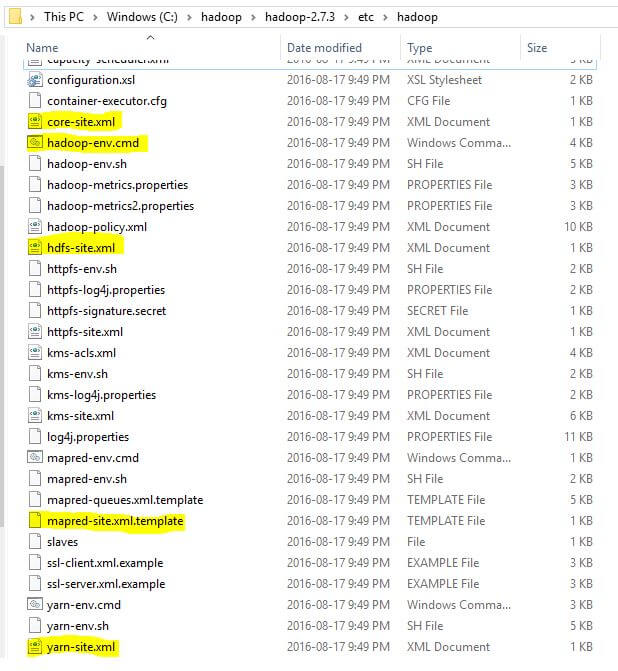
Step 3: Next, we need to configure the following Hadoop files. All of these files are located at this installation path [C:\hadoop\hadoop-2.7.3\etc\hadoop].
- Hadoop-env.cmd
- Core-site.xml
- Mapred-site.xml
- Hdfs-site.xml
- Yarn-site.xml
Step 3.1.1: Edit Hadoop-env.cmd. Open the file in a text editor and add the following lines [add “set JAVA_HOME=C:\java\jdk1.8.0_161”] at Line number 25 as shown below. Make sure that there are no spaces in the path.

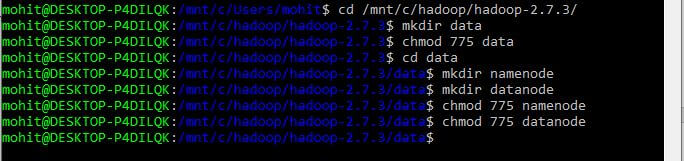
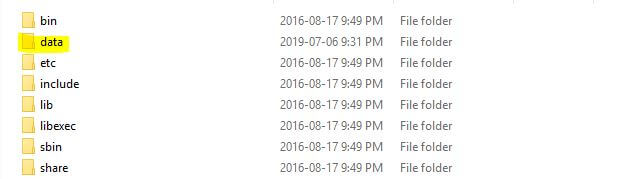
Step 3.1.2: Next, we need to create to create a data folder in Hadoop home directory i.e. C:\hadoop\hadoop-2.7.3 with read and write permissions, as shown below.
Step 3.1.3: Next, create two subfolders within data folder with the name as namenode and datanode with read and write permissions, as shown below.
Step 3.1.4: Next, add the following lines at the end of Hadoop-env.cmd
| Hadoop-env.cmd |
| set HADOOP_PREFIX=C:\hadoop\hadoop-2.7.3 set HADOOP_CONF_DIR=%HADOOP_PREFIX%\etc\hadoop set YARN_CONF_DIR=%HADOOP_CONF_DIR% set PATH=%PATH%;%HADOOP_PREFIX%\bin set HADOOP_HOME_WARN_SUPPRESS=1 set HADOOP_ROOT_LOGGER=”WARN,DRFA” |
Step 3.2: Edit Core-site.xml. Open the file in a text editor and add the following lines between the configuration tags.
| Core-site.xml |
| <?xml version=”1.0″ encoding=”UTF-8″?> <?xml-stylesheet type=”text/xsl” href=”configuration.xsl”?> <!– Licensed under the Apache License, Version 2.0 (the “License”); you may not use this file except in compliance with the License. You may obtain a copy of the License at http://www.apache.org/licenses/LICENSE-2.0 Unless required by applicable law or agreed to in writing, software distributed under the License is distributed on an “AS IS” BASIS, WITHOUT WARRANTIES OR CONDITIONS OF ANY KIND, either express or implied. See the License for the specific language governing permissions and limitations under the License. See accompanying LICENSE file. –> <!– Put site-specific property overrides in this file. –> <configuration> <property> <name>fs.defaultFS</name> <value>hdfs://localhost:19000</value> </property> <property> <name>hadoop.proxyuser.<<WINUSER><.hosts</WINUSER></name> <value>127.0.0.1,192.168.59.1</value> </property> <property> <name>hadoop.proxyuser.<<WINUSER><.users</WINUSER></name> <value><<WINUSER><</WINUSER></value> </property> <property> <name>hadoop.proxyuser.<<WINUSER><.groups</WINUSER></name> <value><<WINUSER><</WINUSER></value> </property> </configuration> |
Step 3.3: Edit Mapred-site.xml. Open the file in a text editor and add the following lines between the configuration tags.
| Mapred-site.xml |
| <?xml version=”1.0″?> <?xml-stylesheet type=”text/xsl” href=”configuration.xsl”?> <!– Licensed under the Apache License, Version 2.0 (the “License”); you may not use this file except in compliance with the License. You may obtain a copy of the License at http://www.apache.org/licenses/LICENSE-2.0 Unless required by applicable law or agreed to in writing, software distributed under the License is distributed on an “AS IS” BASIS, WITHOUT WARRANTIES OR CONDITIONS OF ANY KIND, either express or implied. See the License for the specific language governing permissions and limitations under the License. See accompanying LICENSE file. –> <!– Put site-specific property overrides in this file. –> <configuration> <property> <name>mapreduce.framework.name</name> <value>yarn</value> </property> <property> <name>mapreduce.jobtracker.address</name> <value>local</value> </property> <property> <!– total memory allocated in MB to each map job from total RAM –> <name>mapreduce.map.memory.mb</name> <value>512</value> </property> <property> <!– total memory allocated in MB to each reducer job from total RAM –> <name>mapreduce.reduce.memory.mb</name> <value>512</value> </property> <property> <!–values of this proterty should be less then mapreduce.map.memory.mb –> <name>mapreduce.map.java.opts</name> <value>-Xmx256m</value> </property> <property> <!–values of this proterty should be less then mapreduce.reduce.memory.mb –> <name>mapreduce.reduce.java.opts</name> <value>-Xmx256m</value> </property> </configuration> |
Step 3.4: Edit Hdfs-site.xml. Open the file in a text editor and add the following lines between the configuration tags.
| Hdfs-site.xml |
| <?xml version=”1.0″ encoding=”UTF-8″?> <?xml-stylesheet type=”text/xsl” href=”configuration.xsl”?> <!– Licensed under the Apache License, Version 2.0 (the “License”); you may not use this file except in compliance with the License. You may obtain a copy of the License at http://www.apache.org/licenses/LICENSE-2.0 Unless required by applicable law or agreed to in writing, software distributed under the License is distributed on an “AS IS” BASIS, WITHOUT WARRANTIES OR CONDITIONS OF ANY KIND, either express or implied. See the License for the specific language governing permissions and limitations under the License. See accompanying LICENSE file. –> <!– Put site-specific property overrides in this file. –> <configuration> <property> <name>dfs.replication</name> <value>1</value> </property> <property> <name>dfs.namenode.name.dir</name> <value>file:///C:/hadoop/hadoop-2.7.3/data/namenode</value> </property> <property> <name>dfs.datanode.data.dir</name> <value>file:///C:hadoop/hadoop-2.7.3/data/datanode</value> </property> <property> <name>dfs.webhdfs.enabled</name> <value>true</value> <description>Enable WebHDFS (REST API) in Namenodes and Datanodes.</description> </property> </configuration> |
Step 3.5: Edit Yarn-site.xml. Open the file in a text editor and add the following lines between the configuration tags.
| Yarn-site.xml |
| <?xml version=”1.0″?> <!– Licensed under the Apache License, Version 2.0 (the “License”); you may not use this file except in compliance with the License. You may obtain a copy of the License at http://www.apache.org/licenses/LICENSE-2.0 Unless required by applicable law or agreed to in writing, software distributed under the License is distributed on an “AS IS” BASIS, WITHOUT WARRANTIES OR CONDITIONS OF ANY KIND, either express or implied. See the License for the specific language governing permissions and limitations under the License. See accompanying LICENSE file. –> <configuration> <!– Site specific YARN configuration properties –> <property> <name>yarn.nodemanager.aux-services</name> <value>mapreduce_shuffle</value> </property> <property> <name>yarn.nodemanager.aux-services.mapreduce.shuffle.class</name> <value>org.apache.hadoop.mapred.ShuffleHandler</value> </property> <property> <name>yarn.nodemanager.resource.memory-mb</name> <value>10000</value> <description>Amount of physical memory, in MB, that can be allocated for containers.</description> </property> <property> <name>yarn.scheduler.minimum-allocation-mb</name> <value>500</value> </property> <property> <name>yarn.application.classpath</name> <value>%HADOOP_CONF_DIR%,%HADOOP_COMMON_HOME%/share/hadoop/common/*,%HADOOP_COMMON_HOME%/share/hadoop/common/lib/*,%HADOOP_HDFS_HOME%/share/hadoop/hdfs/*,%HADOOP_HDFS_HOME%/share/hadoop/hdfs/lib/*,%HADOOP_MAPRED_HOME%/share/hadoop/mapreduce/*,%HADOOP_MAPRED_HOME%/share/hadoop/mapreduce/lib/*,%HADOOP_YARN_HOME%/share/hadoop/yarn/*,%HADOOP_YARN_HOME%/share/hadoop/yarn/lib/*</value> </property> </configuration> |
Step 4: There are few other files which are specifically required for windows 10 OS. The instruction can be gathered from the below link to build those files.
| BUILDING.txt |
| https://svn.apache.org/viewvc/hadoop/common/branches/branch-2/BUILDING.txt?view=markup |
Next, take the backup of bin folder at [C:\hadoop\hadoop-2.7.3] and copy paste the bin folder which is required for Windows 10 OS (can be gathered after following the instructions from above link). This completes the installation of Hadoop on Windows 10. Now, lets start the Hadoop.
Starting Hadoop
Step 1: To start Hadoop, we need to open a windows command prompt and navigate to the bin directory in HADOOP_HOME. Next, type the command:
hdfs namenode -format
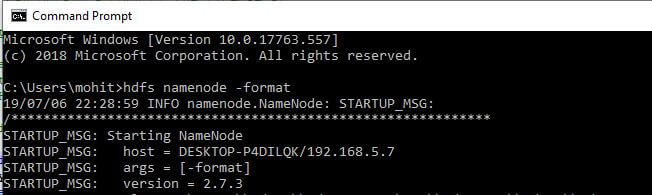
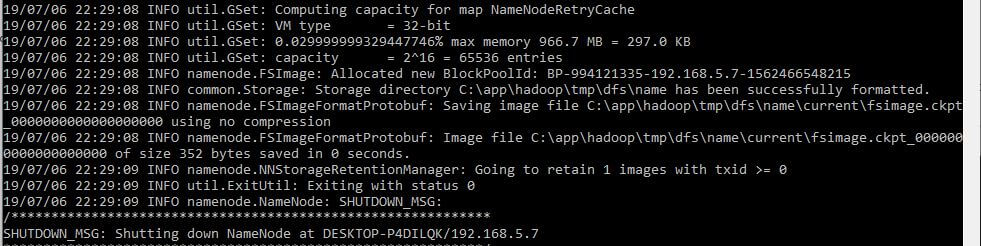
In the above command line screenshot, the result is exiting with the status as 0. This conclude the success. Any non zero status code indicates error.
Step 2: Next, navigate to the sbin directory in hadoop home from enter the command through the command line:
start-dfs.cmd
Step 3: Next, navigate to the sbin directory in hadoop home from enter the command through the command line:
start-yarn.cmd
At this point, you have everything running on your local system. You can check the status by typing the below command to confirm:
jps
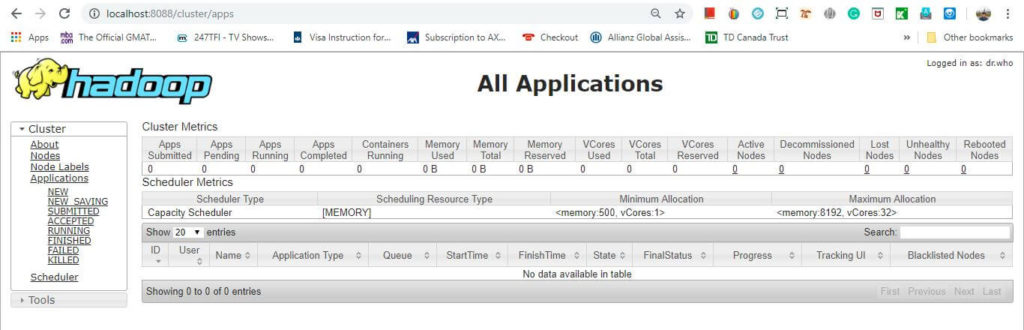
By default, yarn runs on http://localhost:8088/cluster/apps as shown below. It provides an interface and help to access information about current map-reduce jobs in process, resource manager, and failed or successful history.
Conclusion
In this chapter, we discussed about Hadoop installation on Windows 10 OS (Hadoop version 2.7.3).
⇓ Subscribe Us ⇓
If you are not regular reader of this website then highly recommends you to Sign up for our free email newsletter!! Sign up just providing your email address below:
Happy Testing!!!
